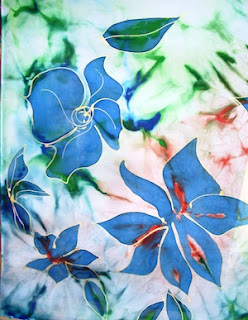
Mila Lansdowne - Art For Happiness

Mila Lansdowne - Art For Happiness
Learn All About Silk Art Business

Tuesday, 4 September 2012

Up to New Adventures

Dear reader,
Our eight weeks blog-workshop is finished. You reached the top of the theoretical basic knowledge and are ready to go on to start and develop your own silk-art business. Information needs to be applied in operational experience now:)
Forty posts gave you a summary of possibilities for your art-based business and you are ready.
Thank you for your attention:)
From the next post on I will be writing about a "real-time" experiences as I go through my own tasks.
The post will be about once a week, if needed more often. Maybe a new blog as well. I'll let you know.
I am experiencing amazing growth and love to place maximum focus on my own business ventures.
As you read between the lines about my business development, the full-time assistant is in; we are adding more space to the Artful Retreat; merchandise to the online store and designing new art products as well...exciting times are on the horizon here.
You will be invited to get an inside look:)
Helping others to explore their talents is the most rewarding experience.
Note: The upcoming retail season October to December usually brings revenue of 40% of the annual sales. So get ready, prepare products, look up consumers' shows and book table. Gather Experience to improve from one event to the other. Take pictures of your show booth and recap. Watch your cost. Define your budget before you commit.
One of my first trade shows, Vancouver 2007
Success is a creation on its own and as every creation it is gradual but unstoppable. 
You will grow fast:)
Have a real enjoyable success.
Thank you for reading.
Talk soon.
With much appreciation:
Mila Lansdowne

Monday, 27 August 2012

Online Store for your Crafts - part two

Once you finished part one of the process as described in the previous post, the next step is quite simple and easy to do.

You will make two decisions
  1. define your e-commerce service provider
  2. decide who will set up your store and post in there the products you have prepared with weight, picture, description, retail price etc.
Note: As always in this workshop the information I am providing is from my own experience and you need to look for your own solutions and additional information.
My intent is to support you in your progress by providing you with a base to start from.

The choice of E-Commerce Service
  • This will be solely your personal decision. There are several choices of tools to use and depending on your skills some of them are free to use. 
  • Some examples:
  1. PayPal offers Shopping Cart you can add to your existing website. Similar service is available from a variety of merchant services.
  2. The https://www.miiduu.com for example offers a free e-commerce service that allows for a slow start with a small number of products and can be transferred to your Facebook page as a Facebook Online Store.
  3. I have now my scarves and fashion on my personal website hosted by Kajabi and also with www.Shopify.com. This service offers you an all-time assistant to help you with your success. Take advantage of the regular special offers and free trials.
  4. I chose Shopify mainly because it is a Canada-based service provider and some of the features a Canadian business needs are included in the package (like already established tax per Province and the option to add real-time Canada Post shipping). Please check the taxation regulation with respect to your business operations if you did not do it yet. You want to have everything in place properly.

Setting up the online store: Who is doing this job?
  1. You certainly can do it yourself. As long you have time and the skills needed. Most of the service providers offer a free-trial period that you can use to find out what is involved. With such experience, you can make more informed decisions and will know what will be the task if you hire a web-master.
  2. Hiring a webmaster can be done in two ways.
  • Hire a knowledgeable person for this project. This person does not need to come to you but can work in his/her own setting if you provide the data necessary (on disc or e-mail). There can be some advantage to have the work done in your office as you can communicate much more efficient if there are some questions (computer with internet access is needed). The better you prepare the materials the faster the web-master will complete the task in or out of the house.
  • Contract out to web-service. This is the most expensive, but most professional solution. Try to get the most out of your money by preparing as much of the material as possible. For your future needs, check with the web-master service, if marketing is part of the package. Marketing is certainly needed to get your online-store "going (I will come to this part later in this workshop). Make sure you define who will do the after-work like adding new products or update.
Check for funding opportunities in your area. 
Often there is funding for small business to hire a post-secondary student to help a small business improve e-commerce performance and online presence.
 Enjoy your progress, celebrate your growth!
Don't forget to take a break:)

Thursday, 23 August 2012

Online Store for your Crafts - part one

Today's consumers is well used to utilize the internet as source of information and shopping.
It is only to your advantage to have online-presence that will allow the consumer to purchase your product online. Your Online-Store.

I touched on the online-presence of your business in the earlier posts about sale-channels.
Today I'd like to give you the information that will save you money and bring efficiency into investments of time and dollars (speaking from experience here :)

Basically there are two ways to set up online-store
  • yourself, using the professional hosting services and portals in existence by professionals
  • hiring web-master
which way you'll go is but the second step in the whole process you do NOT need to make this decision now.

The first and most important step is on your part and there is where you will save real dollars and time when going later to step two.

Scarf 8"x54" on habotai silk random pattern with design enhancement

You need to prepare the materials you'll need for the store. No other person can do it for you. You can not delegate this part without wasting time/money and the risk of inaccuracy. 
The tasks:


First: create a file "web"(or what you choose to name it) on your computer. You will store there all the materials you will prepare as listed below.
  1. your logo in a picture format/ say .jpg
  2. the content/text: description of your services and products with some bio about you or the company (depending on how you want to appear on the web)
  3. the pictures of your products in original- and reduced size (name them so you can pick the one you need, for example I am putting small letter "e" in front of the name of the picture when saving the reduced size.)
  4. If you have categories of products as greeting cards and scarves or scarves in different sizes, make them to categories and collect in separate files as a sub-folders to the web-folder you created at the beginning.
  5. Create inventory list of your products and keep them updated (check frequently as well) include the sales price. If you followed the steps of this workshop, you have already inventory lists and can use those for the work around the online-store materials.
  6. Know how much the shipping will be.
  7. You will need to know the weight of your products. Tip: add one column to your inventory list and write the weight in there to the respective product. 
  8. Archive also the information you find helpful and the links the sides that will benefit you in the work on your online-store.
8"x54" habotai with blossom pattern photographed flat on white board.

Taking Pictures of your product:
  • You can use professional service which will deliver quality and have the best technical set-up for the job.
  • 17"x70" ponge5, blossom photographed draped on flat white board
  • If you decide to take the pictures yourself, there are few tips about scarves:
15"x 60" ponge 5, blossom photographed on a holder
  1. the best is a living model in a pose, if you have a friend who will enjoy to assist (look for inspiration on the internet and publications of fashion professionals)
  2. Dressmaker Forms are another option to arrange your scarves
  3. there are several types of holders you can use (see picture on the right)
  4. or just lay the scarf on a flat surface draped or flat (decision will depend on the design and how you want to show it the best.)
  5. The light is important: white background will reflect the light.  Watch for shadows and eliminate them by moving the lamps, using the flash or changing the position to the window. If taking pictures outsides, find area that is in a shade.
  6. again have a look how the other silk-scarf painters and seller present their products and how they describe them, learn from professionals and pick the style that resonates the best with you.
16"x60" ponge 5 blossom pattern with design enhancement, photographed pinned on a white board

.
If you follow hose lines above, they will mean many hour of work for you. You noticed I am giving you now more time to work as only the action will get you where you want to be.
Wishing much Joy and Success!!

Monday, 20 August 2012

Growing your Revenue - Hiring Help

This blog-workshop moves forward much faster than you would usually develop the traditional home-base business. Many tasks are new to you and take time to finish.  
You do not need to learn all the task involved in running your operation.
You can speed up the start-up process.

One way to speed up the development is to invest money to finance the start-up phase.
The old saying "Time is Money" is very true as you probably observed.

Invest money to buy time:
In regard to the business development the time you can buy with money is to multiply the number of hands and heads. You can delegate tasks other people can do (maybe even better than you). You free yourself for the important parts of your business operation as planning, coordination, buying, calculation, contacts and customer care and more (your business is "you baby"!)

Delegate!
The first thing is your house-chores. Hire a help home-maker/cleaning, gardener/yard-work and child-care.Note: your family will support you if you commit to a schedule with sufficient time for family only.
The next is to contract out specific business tasks to professionals who have the know-how. This could be bookkeeping, printing, selling through sales reps, marketing, web-work; even painting scarves in those easy-to-learn techniques (blossom, triangle, random) you can contract out.

This kind of delegating tasks to have more time for your business is certainly manageable with a small budget and will free your head so you can focus on your goals and responsibilities.


A big plus here is the easiness of commitment in working with contractors and professional. You know you are getting quality of a professional service and if you decide to take a task back in your hands you can terminate the contract quite easily.

I am sure you realized that you need to take help if you like to increase your output and earn more money.  
You need to grow your team. 
 Start with one person and learn the "employer's role" because that's who you will be eventually.

Look forward to the future of having a creative team 
working and prospering with you and your enterprise:)


Saturday, 18 August 2012

Dealing with the Unexpected

Change is the only thing you can really "count on" to experience. 
Know this and you always will progress.

The last post had few guidelines about the personal factors required to grow your art-business to the revenue you require.
  • Keep focus on what you want and why you want it. The dollar number is not that important, but is a good starting point and control instrument. 
  • The Big Why will keep you going 
  • Your openness, flexibility and creativity will get you ready to see the opportunities when your environment changes. 
  • Constructive and creative thinking will be your operating principle.
There is no doubt that you can do what you love and generate income you need to live the life you want. 
There is an amazing creative potential in changes in your environment as those are beautiful opportunities to adjust your success-course (while there is some kind of "a creative disorder" going on:)

The absolute natural growing process runs in following stages (you experienced it many times)
  1. you are on your way to your goal
  2. you experience change in your environment (coming unannounced from the outside)
  3. you experience the impact/consequences in your personal life (could be quite dramatic at times)
  4. you remember your goal
  5. you define new course leading to your goal
  6. you are set on your way to your goal again (but on much more developed level/ You GREW!!!)

In this stage of your business venture, there is no separation between your business matter and your personal life-events. Both are part of your life and influence each other.

You can not control what is happening in your environment, but you have 100% control over your reaction to the changes in your environment.
  • Know that changes are opportunities for new adjustments
  • stay focused on what you want and why 
you always will come out as the winner
(enjoy the journey)

Look back in your life and your will see the growth and knowledge that every incident brought you.


I had several events in my life that brought amazing growth/ just as an example and encouragement for you to follow your dreams
  1. I always wanted to learn and share my knowledge/guide. I defined what I wanted by taking what I liked on my management job (travel and guiding people) and added what was missing (being my own boss and doing my own schedule).
  2. when the company was sold I decided to get out and start my own touring business "Canada for Women"
  3. when a friend left me with an art contract to fill, I stepped in and my silk-artist career begun.
  4. when my husband passed away and I needed to survive, I started to produce greeting cards and selling them in wholesale, going to trade-shows and organize creative retreats. Artful Retreat was born.
  5. when my next life-partner passed away and I again needed make living, I begun to manufacture in large volume with two casual helpers and conduct workshops in schools and institutions.
  6. when my mom became bed-ridden and I had to stay at home with her, I revived contact with art-supply manufacturer and begun to use internet to conduct my business.
  7. Currently I am hiring my first full-time employee and opening my first "real" Online-Store  with official opening in September and have all the added products and services including my Artful-Retreat Bed and Breakfast in my business portfolio. I actually quite enjoy the unpredictability of life, developing trust and the knowing that all is well always. I am filled with enthusiasm, looking forward to more exciting business and personal development (which I already have my course set on).
Life is very precious and it can be lived in inner satisfaction and joy.
STAY FLEXIBLE, OPEN AND CREATIVE
DO WHAT YOU REALLY LOVE AND WHAT BRINGS YOU DEEP SATISFACTION
PROSPERITY MUST FOLLOW

follow your dreams and they will come true :)
I wish you much Joy and Happiness!


Thursday, 16 August 2012

Making Living with your Talent - How to Get There.

In the last post you learned how to figure out your total revenue goal to
get the money you require to live the life-style your desire.
The total number seams to be large, but if you divide it by 12 and know how much you need to earn in average monthly, the whole process becomes more tangible and you can begin to work on that.

you will need:
  1. know where you are now 
  2. know where you want to be, your goal
  3. why you want it the reason why you are doing it
  4. make the first step
  5. be open, creative and flexible

The above is your checklist every time new task is "on the plate".

You have everything you need to achieve your goals - Look how easy it is:
  • you learned in this workshop how to determine the now of your financial situation
  • you learned also how to determine the total revenue from your business that will provide the income you want to have.
  • you learned a technique how to define the important "Why"
  • you only need to make the first step
  • and the next step again
  • step by step you will progress to the goal
  • motivated by knowing "why"

Need to have more information?
look for it in the next post,

Life is supposed to be joyful, you know :)

Tuesday, 14 August 2012

How much do you need to sell to make a living?

I am guiding you here carefully to watching the business part of your activities in the pursuit of your successful business venture.

With the knowledge and skill you gained so far you are in the position to generate significant income.
I am encouraging you to direct your enthusiasm for learning additional method to the development of a revenue which will provide the financial background for your new learning.

You need to know where you stand financially.

Here are few numbers to consider at this little check-point of how you are doing now and how to set the financial control-mechanism.

So far you calculated your sales price with a "rule of thumb" by multiplying the materials by 2.5 or 3.

To look closer, a multiplication of 2.5-times of your material cost means that your material cost is 40% of the revenue/sales price (which represents 100%). A multiplication of 3-times the material cost means material is 33% of the sales price. For better understanding: The smaller the material cost-%-number, the better.
This might look good for the first look.

Now let's add little more detail to it with a bit of math in few very basic guidelines.

For starters, take a period of time, say your last month, and add up your expenses and then summon up also your total revenue for that period.

Define your profit - basic formula:
Revenue minus expenses equals your profit. (Revenue - Expenses = Profit)
With this formula you can check how you are doing now. 

As you'll grow your business you will need more specific information and bookkeeping is a must. There is a detailed chart of accounts in the bookkeeping systems to help you distinguish between the different types of expenses.

Examples of very simplified cost categories for more informed picture

  • material cost including shipping - cost of goods
  • your time (evtl. and the pay for your helper) - proprietor's draw (and wages) cost of labour
  • utilities, phone, rent for the portion of the space used for your business - location cost
  • part of your vehicle expense for the business use - vehicle cost
  • your website and advertising, fees for shows etc. office material expense - cost of advertising and office
  • if you used loan for the start-up and pay interest and insurance on it - cost of borrowing 
Note: The categories above do not reflect the bookkeeping chart-system! This is to help you clarify your financial picture and to provide you with a tool for setting your financial goals for the future.

Dollar figures are one way to read your financial business performance, I am using for planning and evaluation percent numbers.

Basic formula in percent: Revenue (100%) - Cost in% of revenue = Profit in% of revenue

To define the %-number per cost-category, you will divide the total of that cost by the total of sales and multiply the result by 100.
In the example below the cost of goods was in total 40,000. To define the the corresponding %value I devided  the total cost of good by total sales and multiplied the result by 100:
40,000 : 100,000 x 100 = 40%

This is an example for the cost in %-share of your revenue.
  • revenue/sales = 100%
 
  • cost of goods/material including shipping cost 40%
  • wages your personal remuneration/draw (and helper's pay) 30%
  • location cost 10%
  • vehicle cost 5%
  • cost of borrowing 5%
  • profit 10%
  • Note: if you add-up those %-numbers you will also get 100%
The percent numbers per category as listed above are just a guideline and will vary from business to business, but you can plan with this formula (using your own data):

Find answer to the Big Question: How much do you need to sell to make a living?

in dollar figures from the example above:
  • sales of 100,000.00
  • will give you 30.000 for personal income (proprietor's draw) and wages
  • with 40,000 for materials
  • 10,000 for rent and other location cost
  • 5,000 for your vehicle use
  • 5,000 for payment of your loan
  • 10.000 profit / for your business expansion and reserve for opportunities
In this example, a revenue of 100,000 will give you 2,500 monthly income if you are working without a helper.

Note: It is natural to have higher cost at the start-up point when you need to buy all the basic equipment and set up the working station. The tendency but must lead up to more revenue and more profit.

Be enthusiastic about recording and know your numbers. Make a chart with monthly comparison and use your amazing creativity to manage the numbers to your favor. 

The financial records are a tool to adjust for better results. You can lower the material cost, expand the revenue through additional service and much more. Cost of material and labor will always be the largest portion and in manufacturing your material cost should be lower then the cost of labor.

Apply your creativity to generate better financial results, think teaching workshops and printed products etc.


If you are not "a number-person":) hire a bookkeeper or find other help. 
You need to know your numbers in order to navigate your enterprise to the envisioned financial success.
Have fun with it!!

Sunday, 12 August 2012

Color-Trends or Individuality

Today I'd like to take a little side-track to the choice of colors for your silk-art products.


When I started selling my first scarves (many years ago:), I was faces with a decision you will certainly be faced with as well.
The first retail store I approached (a fashion-boutique), asked for scarves reflecting the upcoming season's color trends.
I was not prepared for that neither did I know where can I get the information about what the color trend will be in 6 or 12 months.

What I learned might help you, if fashion is the path you like to follow.


The colors for every season are defined long in advance. The Color Marketing Group identifies the trend of colors and design in a non-competitive forum of professional members from all around the world.
The designers and manufacturers use this information in their work and present their own collections and themes.
The color themes are dedicated to specific application in diverse industries. There are seasonal color trends for fashion, for knitwear or for home design, vehicles etc.

You will find published color trends on the Internet and many blogs.
For your convenience there are three links to the trends of upcoming fashion seasons.

Fashion colors Fall 2012 as published in Fashionising.com

Fashion Colors Fall-Winter 2012-2012 as released by APLF and published in Fashion Trendsetter.

Fashion Colors Fall-Winter 2013-2014 as released by Lenzig and published in Fashion Trendsetter.

To have the knowledge of the upcoming color trends will allow you to position your product more clearly in the market you are targeting, and will also speak for you as a competent expert and informed professional.

Of course fashion is just one of many options you have. 
Design your work, so it gives You satisfaction and Joy. 
When you love your products, whatever they might be, you will be able to connect with the buyer through your enthusiasm.
After all, emotions play a big role in every sale.
Have a wonderful week:)


Friday, 10 August 2012

Design Enhancement using Stretching Hoop.

Easy - playful - relaxing is the work on design enhancement

The easiest way to create a design enhancement is a partial application.

Partial Design enhancement on a scarf in blossom design
In this post we are using the round stretching frame/hoop for easy start. (the attachment to a rectangular stretching frame will be discussed in a separate post).

The process:
  • decide what type of silk-piece you are creating. A silk "scarf" as we said can also be used as a center-piece or table runner, curtain etc.
  • wipe clean you working area (make sure there are no paint- or water-spills from previous work)
  • stretch a small piece of silk on a small hoop (ideally the same kind of material as on the scarf you will be working on). This will be your try-out silk piece. In the picture below you see also a color-wheel  which helps you with the choices of colors and a roll of paper-towels to keep your working area clean. All those utensils should be placed to the side of your working station or on a service table in your reach.

  • Now, take the scarf you picked for the design enhancement and spread it out on you working area so you can see the pattern.
  • For the enhancement, choose one part that is located so it can become a focal point when finished and in use.
  • For example the work of my student shown above is a pointed 17"x70" ponge8 festive shawl and the enhancement was the center of the scarf, which then was on the back of the person wearing it. In this particular work, small corresponding patterns were placed on the ends of the scarf visible in the front when worn).
  • Take the stretching hoop apart, center the part of scarf you want to work on over the bottom hoop (the smaller one), slide the top part over it. With the help of the hoop-screw affix the silk in the frame. Make sure the silk is fully stretched (you can pull on the outside part to achieve this very easily while tightening the screw).
  • Make sure the silk does not touch the working surface, if necessary use something to raise the frame at least on one side to allow for enough space between the work and the working surface.
  • Create! Take the tube with the outlining paint and while leaving the cap on it, look closely at your work - imagine the design you can pull out of the existing color pattern.
  • open the tube and try the flow of the paint on the "try-out" silk you prepared on the smaller hoop. You are using the tube-paint as a pen. You apply slight pressure while moving your hand. The tip of the tube is in about 45 degree angle to the surface and you are moving "downward"allowing the paint to flow freely. The movement should be continuous. To break the process, choose a point where you can interrupt without impacting the design. You will need a "thinking break": when you pause your work with the outlining paint, always cover the tip of the tube with the cap, hold the tip in a paper towel or put the tube aside. The paint has tendency to spew from the tube when held in the hand. Before you finish the outlining work, look closely and check for gaps in the lines and close those with a touch from the outlining paint tube.

  •  Let the outlining paint dry. The surface should be dry in 30 or 45 minutes if you need to rush. Better is to set the work aside for an hour or two to ensure a worry free next step (painting the new pattern).
  • As soon the outlining paint is dry, you can play with the colors. The choice is yours and you can apply different shades. The "try-out" piece is an useful help as you can test every color there before you start to apply it on the original piece.
  • When using the silk-painting brush you need to know that the fabric will "take the paint from the brush". This is a difference to paint on canvas or paper. Make your first try on the try-out piece. If the brush was new, wash it and dry it out. Shake the jar with the paint, open it and put the lid on your service-table away from your work. Dip the brush in the paint and by sliding it over the jar mouth, remove the excess paint. The silk-painting brushes have large holding capacity, there will be enough paint still and you will prevent unwanted dripping.
  • While painting, you can hold the jar with the paint in one hand or dip the brush, put the jar aside and hold your hand under the brush to prevent dripping on your work.
  • on the try-out piece, touch the silk with the brush and observe how the paint starts to move and spread, Here the silk is working with you. You do not need to swing the brush, quite in the contrary you will apply the paint by moving the brush in a continuous movement filling the open spaces. 
  • When starting on your original work, pick for the beginning small areas to fill so you can get "a feel" to the technique and behaviour of the material.

  • Now you just let your phantasy soar. Fill the outlines with paint or leave them just outlining the original pattern. You will be delighted with the new images emerging from the work.
  • Note: finish painting of one enclosed section without interruption. Move the brush in a continuous movement from one end of the enclosed are to the other until fully painted. (if you would stop, the paint will dry on the last painted edge and create there a dark line that can only be "camouflaged", but not removed.
  • Note: while you apply the paint, the silk will expand and you will need to stretch the silk again.
  • Before you start adjusting the silk, check the area under your work for paint spots and clean it dry. 
  • Straighten the silk out by loosening the hoop-screws and pulling the fabric gently straight. For that reason, do not paint fully to the edges of the stretching hoop. Then tighten it again and continue your work. If the fabric hangs through just a little bit , you can continue by lifting up one side and have the frame tilted (use this technique only if the silk is not too wet and is only slightly expanded).
  • When you finish painting, leave the work on the frame till it is thoroughly dry.
  • Take your work of the stretching hoop and place it on ironing board face down/reverse side up.
  • Iron your work in cotton-setting by slowly moving the iron over the surface of the reverse side. 
  • This ironing is to fix the paint and the resist onto the silk. Do not worry about the still visible wrinkles. Let the work cool down; best is overnight.
  • There will still be some wrinkles, which you will iron out by dipping the silk in water, hand-wring it and place it on the ironing board upside down. 
  • One more time, iron the silk in cotton-setting from the reverse site. Watch the steam coming from the wet silk. Tip: You can use kitchen towel over the silk to absorb the moisture first and then remove the towel and iron over the silk to iron it dry. 
  • To have a wrinkle-free result, use your free hand to hold the silk stretched see picture below.
 Use your free hand to keep the silk stretched. Maintain distance to the hot iron for your safety.

Now you have your first creation in design enhancement - Congratulation!!!
The explanation above seems like lots to remember, but it is not. I am telling you those many details to prepare you the best I can for your work. All those moves will be soon natural to you with no need for thinking of it. Once you have the skill, which is very easy to master as you see, your focus will be with the work and the unique design that will come out of your hands. The real fun will begin:)


Wishing Happy Friday and a wonderful weekend!

Wednesday, 8 August 2012

Painting on Stretching Frame - Design Enhancement

This is the first post in Chapter two, a section dedicated to most popular silk-painting method:

Painting on Stretching Frame.

The exercises and information will give you a base for you further development. I will introduce you to the most common techniques and you can take it  from there and create your individual style. Find some appetizers on the Silk Painters International (SPIN Website :) or on the SPIN Facebook Group Posts

Important Note: To create products with those techniques is more labor-intensive and time-consuming, which will reflect in your production-cost and therefore in the retail price as well.

I am introducing the Painting on Stretching Frame method as it represents basic knowledge in regards to silk-painting. You need to have this information for you professional career.
The application of this method in regards to your silk-art business will not only be for your own silk-painting creations, but also for your work as workshop instructor with equitable honorarium.

We will begin with the most easy technique: The Design Enhancement.
Note: You need to have the information from the previous  chapter to complete the task.
The material needed is:
  • 1 stretching frame and silk-pins (or hoop)
  • 1 of the scarves you created in the first chapter (any of the three designs, blossom, random or triangle).
  • 1tube of outlining paint in a color that is in harmony with the colors of the scarf
  • 1 silk-painting brush medium width  #6,8 or 10

The Goal is to highlight parts of the design created previously(blossom, triangle or random) and develop new pattern.
Below are examples of the enhanced design based on a first application in one of the learned folding techniques (blossom, triangle or random) see the caption below the photograph.
Random design enhanced with Javana light-gold outlining paint and Javana silk-paint in primary blue

A blossom and random technique was applied in intentional composition to create the basic pattern from which leaves and blossoms were developed in variety of color-tones in yellow, green and red with anthracite outlining paint.

Partial enhancement with gold outlining paint and the same red color as first used for basic random pattern.

Pale triangle design enhanced with pearl-blue outlining paint and the same color of blue and green as used for the first application.
Blossom Design on large 17"x70" ponge 8 scarf was worked over with outlining paint in gold using as fill-color the same nuance as in the first application.

This process of design enhancement is very easy to master and we will go through the steps in the next post.
Hope you are enjoying this workshop - thank you for visiting.

Tuesday, 7 August 2012

Passive Income from your Art: Greeting Cards

To open the door of possibilities even more, I'd like to guide you to the idea of a passive income or semi-passive at least.
The silk you are painting can be utilized in many ways and today I am talking here about printed products.

You experienced now that your personal productivity regarding silk-painting has its limitations in regards to the volume you can produce and the time you have available. Not to mention the often observed imbalance between the value of your work/product and the price you receive in exchange.

Your silk-art career is supposed to be fulfilling. You want to enjoy what you do in your creative time and keep the pressure out of it. So we need some creativity on the revenue side:)

There are ways to make revenue from your art without even selling the silk-original.

Example: Greeting Cards and Postcards

Instead of cutting out the images from your silk with the scissors (as described in the last post), you use your camera to take the cut.

This is the scarf original
This is the camera-shot


 Now you can take that picture and use it on your own greeting cards and postcards.

Your time and work will be spent on the creation of the silk-original and choosing the picture you'd like to use.

The rest can be done in a print-shop or you can use the already mentioned Vistaprint Service which is available online in many countries. This is the link to Vistaprint Canada  and this for Vistaprint America  and Vistaprint Australia , Vistaprint Nederland... the list of the countries is long and I am sure you will find your closest service there just look in the top right line and choose your language in the drop down menu.

Another example, this time the full-size shot/ not an out-cut:

The original silk-painting: 40"x60" banner


Greeting Card

Once you have those products, you'll supply the outlets you lined up for your silk-scarves and the $$ will march into your door.
Note:What we said about the importance of maintaining the inventory in consignment store regarding your scarves, applies of course for the greeting cards and any other product as well.

If you are starting on this new product with a retail partner, you can suggest to exchange the less selling images at the beginning to help him to take "the risk"- think win-win and you both will benefit (actually is win-win-win because the consumer will benefit from the beauty of your work:)

I am suggesting to every artist I meet, to explore the possibility of creating printed products from the original work.
It is simple, easy to achieve, and most of the work involved can be contracted out or delegated.

Suggestion from personal experience: you will see that some images sell better then other. At the beginning print just small amounts per image and keep track of the sales. Once you see the trend you can print in larger quantities for better price.

You can do your printing on your printer as well. I did it for many years with much success and might write a separate post about it, later on. If you want to explore your own in-house-printing, just think quality and you will have a great product.

As a rule of thumb:
There are many tasks to complete. You are the artist, no other person can create you images therefore painting and coordinating is the priority. Delegate what someone else can do and focus on generating revenue.

Sunday, 5 August 2012

Grow your Art-Biz Revenue.

Before we enter next chapter of learning additional techniques, I'd like to show you that you can already create larger revenue; right here in your current stage of your silk-art skills.

You can do so with the basic method you learned and its three design-variations:
  • blossom
  • triangle
  • random
 -
With those three designs you have a solid base from which you can create countless products.

Example: 30"x45" banner/wall hanging "Romantic Garden"

  • Oblong Scarves /Ponge 5 and 8, Crepe deChine, Crepe Satin, Chiffon , Gaze and more

  • Square Scarves /Ponge 5 and 8, Crepe deChine, Crepe Satin, Chiffon , Gaze and more

  • Small handkerchiefs for ladies 11"x11" for men 13"x13" on Ponge 8, Twill or Crepe Satin 
  • Sarongs and wraps, festive shawls... 
  • Table center-pieces: use heavier silk Ponge 8 or higher or Crepe De Chine
  • Pillows : you can buy ready made silk pillows with a zipper or overlap-closure or with open seams to sew when you finished the painting.
  • Wall hangings (see first photo above)
  • Banners
  • Drapes and curtains: you can paint on ready-made silk scarves-blanks in the respective size. The fashion in home-decor makes making drapes and curtains extremely easy with rods that have small clips attached to the rings, so no need for hollow-hem or loops.
  • Greeting cards: using the scarves-material that did not meet your end-product-quality-expectations you can create many additional products. I am sure you already discovered the amazing images created in the silk with those three folding techniques - especially if you look closer. Pick out those little "images" (shapes and patterns) that inspire your phantasy. Take scissors and cut them out (with enough space around for attachment). These little abstract pictures can be matted or attached to a card-stock greeting-card-blank. (Use double sided adhesive in full spread or when using Passe-partout 3- or 2-fold cards just use few points to affix the silk firmly.) Think quality and think packaging: a clear box with 3 of your Art-Card Originals (with envelope) will make a wonderful present and a great product, which will get you repeat-customers. You will become a sought-after artist:)

This is 5"x7" 3-fold card with a small out-cut - I found the larger out-cut, the better(there are oval and rectangular types on the market in a variety of colors)


  • You can use those small pieces for beautiful little framed picture. Choose a quality frame to honor your work.  (there is a plenty of picture-frames in stores in standard sizes with acceptable price).


  • AND! The most rewarding product/service you can develop: you can teach others this simple, relaxing and enjoyable silk-art method; conducting your own workshops, community events, seniors classes and school projects.
Picture above: BC Arts and Culture Week workshop.
Once you check out the silk-blanks that you can get through the many online-stores, you will discover plenty of supplies and your inspiration will be unstoppable.

You are amazingly creative!
Use your talents to create products and services, share your skills.

You are ready!
Launch a creative career that will give you satisfaction and the most enjoyable way to make living. 
You have endless opportunities for growth as an entrepreneur and as an artist.
Thrive!


Thursday, 2 August 2012

Outlining Paints, Gutta and Resists

Today we will learn about the last piece needed for our work on the design enhancement, the outlining paint.
Just to recap:
you learned three design methods which are the starting point in the creation of your silk-scarves.
to learn the next stage, the design enhancement, we worked our way through the information about stretching frames, silk-fasteners and today we will complete this learning session with the information about outlining paints.

Many terms refer to the same kind of material. Outlining Paints, Gutta and Resists all have one characteristic in common; they have water-repelling quality, which is why they are called resist paints as they do not allow/=resist the paint travel over the fabric or penetrate the fabric.
The information you will be reading is prepared for the upcoming work and will provide you with the knowledge required for the next stage in your creative progress. There is much more to say about resist paints as it is about all materials mentioned here before, which will be delivered later in our learning process.

In our planned project, we will use colored resist paint/ outlining paints in tubes.

Outlining Paints are available in a variety of colors:
  • basic colors
  •  
  • pearl colors with more sheen
  •  
  • glitter colors with a real spark
The choice of the color will depend on the kind of design you'd like to create and also on the purpose the scarf is intended for.

The tube allows for pen-like writing/drawing on the stretched silk, which will be the starting point in our next session.

Note to the resist/gutta paints.
Not included in the explanation above is the original gutta, a clear water repelling material. We will be working with this material later on as it applies to different techniques and effects than the upcoming session of our design enhancement.
Enjoy your Friday:) And Have a wonderful weekend:)

Wednesday, 1 August 2012

Silk-Painting Brushes

Very important tool for your professional work is the best silk-painting brush.

 How to choose the right silk-painting brush:

Below are several pictures of different types of brushes used in silk-painting. Those brushes vary according to the purpose they are made for.

The first two pictures show brushes you will use most often. They are made for painting with the silk-paints and have two characteristic in common:
  • high capacity to absorb and hold the silk-paint.
  • long fine tip (even wide silk-painting brush will have a longer thin tip)


Following pictures show silk-painting brushes used for specific techniques and you'll find the information in the caption.
Mohair Silk-painting brushes for priming and working large areas.

Fan- and marbling brush for silk-painting
For our work on the design enhancement you will need a silk-painting brush similar to the first picture shown above.
If you can not find a specific silk-painting brush, choose one with not too soft bristles but with a long, fine tip (synthetic brush is OK as well).
Enjoy your Thursday:)


Tuesday, 31 July 2012

Silk-Painting Frames - more info

As there was a plenty of information in the last post I'd like to spend little bit more time on the information about silk-painting frames.
Javana Batik-Frame


Reasons why the frame must be adjustable (either through the elastic fasteners or in the length of the frame-arms).
  1. when we paint on the frame, the silk needs to be stretched all the time to achieve even color-result. (you now know "the behavior" of the color pigments from our folding (faux sun technique). The pigment will travel upward and create darker lines es the paint is drying. If the silk hangs through, the paint will collect and build a puddle and unsightly spots.
  2. the hand-rolled scarves vary in the exact measurements even being labeled as the same size, so you need to be able to accommodate the differences.
  3. the silk will expand in the painting process and needs to be kept stretched

One level frame vs two level frame:

  • both frames allow for adjustment
  • the two-level frames are less expensive
  • the one level frame sits more firm once you fasten the screws. 
  • both types can be extended to a larger size (one-level frame requires specific connector, two level frame can be extended using another two-level frame material.
below you see in detail those two types and the difference.
Check the SPIN Facebook page to see what professional silk-painters work with. There is very inspiring information about the Silk Festival.


 Two-Level Silk-painting Frame


   One-Level Silk-painting Frame


Enjoy your creative journey:)
Happy Wednesday to you.